

| Categories | Electric Generator Manuals, Honda Generator Manuals |
|---|---|
| Tags | Honda Generator EM6000GP |
| Download File |
|
| Document File Type | |
| Copyright | Attribution Non-commercial |
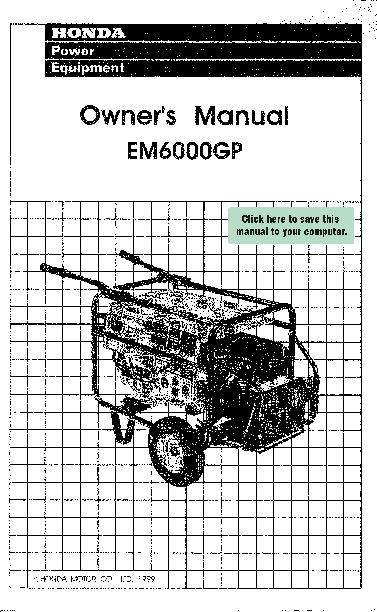
HONDA Power Equipment Owner’s Manual EM6000GP plug and install the ;q. spark plug in the plug cap. 3) Set the plug side electrode on the cylinder head.. 4)Crank the engine, sparks should jump across the gap. 39 No electricity at the AC receptacles: Is the AC circuit breaker ON? YES Is the AC circuit protector ON? YES Check the electrical appliance or equipment for any defects. NO Reset the AC circuit protector. NO Turn the AC circuit breaker ON.
NO DEFECTS Take the generator to an authorized Honda generator dealer. · Replace the electrical appliance or equipment. · Take the electrical appliance or equipment to an electrical shop for repair. DEFECTS 40 WIRING DIAGRAM 41 SPECIFICATIONS Dimensions EZGR Power product description code 845 mm (33.3 in) Lenath 510 mm (20.1 in) Width 490 mm (19.3 in) Heiaht 83 kg (183 Ibs) Drvweiaht Without wheel kit (wheels, stands, and handles) * * * *: * EnalOe Enaine Displacement [Bore x Stroke] Compression Ratio Enaine Speed Coolina System lanition System Oil Capacity Fuel Spark Plua GX390 (LP-GAS) 389 cm 3 (23.7 cu-in) [88 X 64 mm (3.5 X 2.5 in)) 8.0: 1 3,600 rpm Forced air Transistorized ma :meto 1.1 (1.2 US at, 1.0 Imp at) LP-GAS (with a propane content of 95 % or higher) BPR6ES (NGK) a Generator AC output Rated Voltaae Rated Freauencv Rated Ampere Rated Output Maximum Output ipeCI Icat ons Tune-up S ” f 120/240 V 60 Hz 41.7/20.8 A 5.0 kVA 6.0 kVA ITEM Soark olua aao Valve clearance Other soecifications SPECIFICATION 0.70-0.80 mm (0.028-0.031 in) MAINTENANCE Refer to oaae: 32 IN: 0.15 ± 0.02 mm (cold) See your authorized EX: 0.20 ± 0.02 mm (cold) Honda dealer No other adjustments needed. NOTE: Specifications may vary according to the types, and are subject to change without notice. 42 INSTALLATION OF KIT PARTS SATTERY TRAY KIT 1. Install the battery guard on the frame. Set the battery tray on the battery guard and tighten the bolts 2. Route the starter cable under the top cover and connect it to the starter solenoid. 3. Connect the ground cable to the generator rear housing. 4. Set the battery on the battery tray and secure with the battery bracket. Connect the starter cable to the battery positive (+) terminal first, the,n to the negative (-) terminal. When disconnecting, disconnect at the battery negative (-) terminal first. 5. Install the battery guard plate on the battery guard. 43 STARTER CABLE (positive) STARTER CABLE BATTERY BRACKET BATTERY GUARD BATTERY GUARD PLATE BATTERY TRAY 44 WHEEL KIT 1. Install the two wheels on the axle shaft. 2. Install the axle assembly on the generator using two bolts and nuts. 3. Install the two stands on the under frame. Shorter Longer end end STANDS WHEELS 45 4. Remove the upper frame. Install the two handles with brackets on it using six bolts and install the upper frame on the body using four bolts. BRACKETS HANDLES 46 REMOTE CONTROL KIT (optional parts) 1. Install the relay box on the right side of the generator. 2. Remove the blind 8-P connector from the back of the control box and connect the relay box connector instead. 3. Connect the remote control cable to the remote control and relay box. RELAY BOX REMOTE CONTROL CABLE NOTE: · Connect the blind connector when not using the remote control kit. · Engine will not start unless the blind connector is connected. 47 Starting the engine with remote control 1. Turn off the engine switch at the generator and remove the key. 2. Turn the relay box switch to the ON position. 3. Open the main gas valve. Liquid propane gas has a sulfur scent added. If you smell a “rotten egg ” odor when the gas is turned on, turn the gas off and have the gas connection and generator inspected by a qualified propane technician or servicing Honda propane gas generator dealer. RELAY BOX RELAY BOX SWITCH 4. Turn the engine switch at the remote control box to the ON position. 5. Press the starter button until the engine starts. The pilot lamp comes on after the engine starts. PILOT LAMP REMOTE CONTROL BOX ENGINE SWITCH 48 Stopping the engine 1. Turn the engine switch at the remote control box to the OFF position. ENGINE SWITCH 2. Turn the relay box switch to the OFF position. 3. Close the gas main valve. 49 WARRANTY SERVICE INFORMATION Servicing dealership personnel are trained professionals. They should be able to answer any question you may have. If you encounter a problem that your dealer does not solve to your satisfaction, please discuss it with the dealership’s management. The Service Manager or General Manager can help. Almost all problems are solved in this way. If you are dissatisfied with the decision made by the dealership’s management, contact the Honda Power Equipment Customer Relations Office. You can write to: American Honda Motor Co., Inc. Power Equipment Division Customer Relations Office 4900 Marconi Drive Alpharetta, Georgia 30005-8847 Or telephone: (770) 497-6400 When you write or call, please give us this information: · Model and serial number (see pages 9 and 10)
Wikipedia’s page for Honda
Publisher: http://www.hondapowerequipment.com